
What Happens During a Septic System Inspection: A Step-by-Step Guide
If you have never owned a septic system before, the first inspection can feel like a mystery. You know a crew is coming to your Fontana property, but you do not know what they will dig up, what they will check, or what they will tell you at the end. This guide walks through the septic inspection steps exactly as they happen during a septic system inspection, step by step, in plain language. No jargon, no scare tactics, just what a straightforward local crew actually does when they show up.
Knowing the process matters for two reasons. First, if your toilets are backing up right now, an inspection tells you whether you need a simple pump-out or a bigger repair. Second, if you own a rental duplex or a few units on septic, a routine inspection is the cheapest insurance you can buy. According to the U.S. Environmental Protection Agency, regular septic maintenance runs $250 to $500 every three to five years, while repairing or replacing a failed conventional system costs $5,000 to $15,000. That gap is the whole argument for knowing what an inspector looks for.
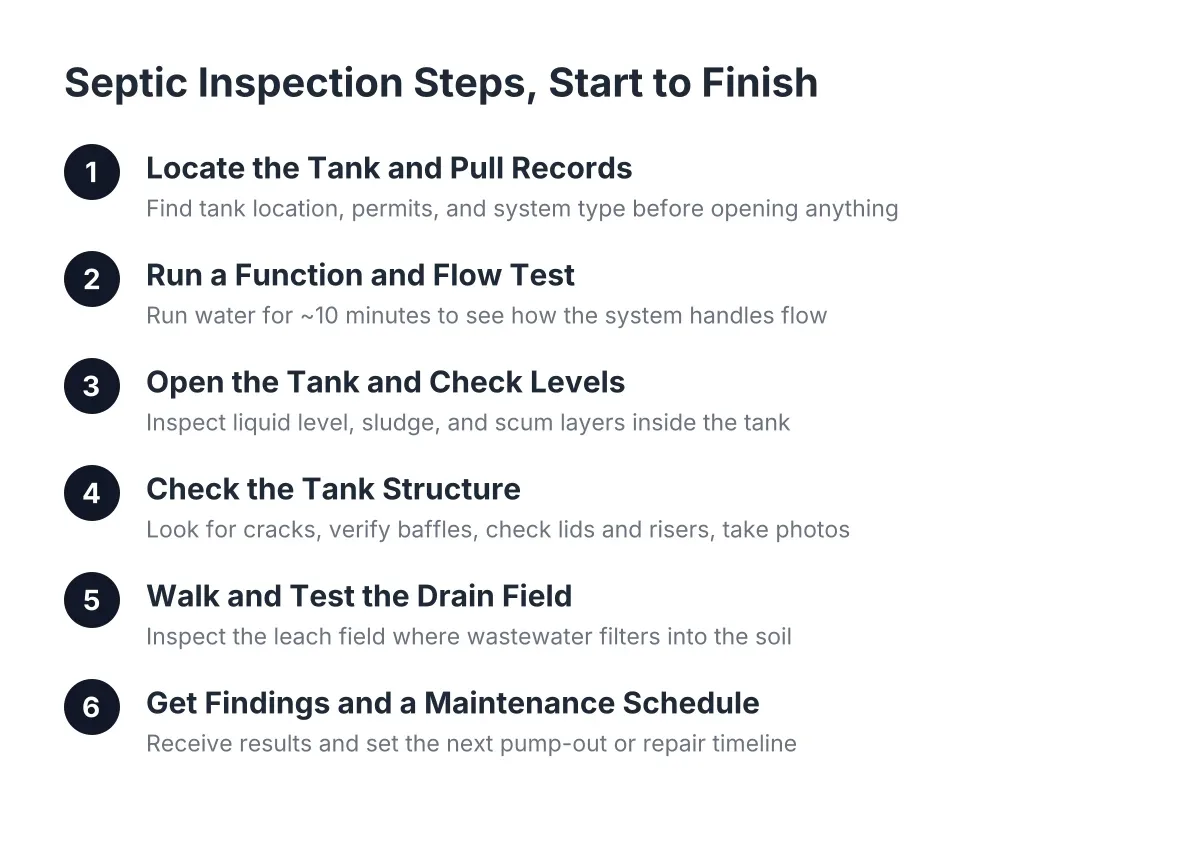
Step 1: Locate the Tank and Pull the Records
Before anyone opens a lid, a septic tank inspector needs to know where the tank sits and what kind of system it is. In Fontana and the surrounding San Bernardino County area, county records often show the original permit, the tank size, and a rough site sketch. For reference, San Bernardino County Department of Public Health requires a minimum 1,000-gallon tank for a 3-bedroom home and 1,500 gallons for a 5-6 bedroom home.
If records are thin, which is common on older properties, the crew finds the tank by tracing the main drain line from the house. A conventional system has two main parts, according to the U.S. Environmental Protection Agency: the septic tank and the drain field. The inspector needs to find both.
What you can do before the visit:
- Gather any paperwork from your home purchase that mentions the septic system
- Note where the ground stays green or soggy, and where you smell sewage
- Clear parked cars, planters, or storage off the likely tank area
- Write down the last pump-out date if you know it
For a landlord with units in Rialto or Colton, keep a simple file per property with tank location, size, and service dates. It saves time on every future visit and keeps tenant downtime short.
Step 2: Run a Function and Flow Test
Next, the inspector checks how the system handles water before touching the tank. A common method is running water into a cleanout for around ten minutes to simulate normal household use. The inspector watches whether water moves through the line at a steady pace or starts to back up.
This step answers the question every emergency homeowner is asking: is this a clog, a full tank, or a failing drain field? A slow drain at one fixture usually points to a line problem. Slow drains everywhere, plus gurgling and a sewage smell in the yard, point to the tank or the leach field.
In addition, the inspector will ask about your household habits. A single leaky or running toilet can waste as much as 200 gallons of water per day, according to the U.S. Environmental Protection Agency. That extra water alone can drown a drain field and mimic system failure. Sometimes the fix is a $15 toilet flapper, not a $10,000 leach field. Understanding these septic inspection steps helps homeowners avoid costly repairs.
Step 3: Open the Tank and Check the Levels
Now the crew uncovers the access lids and looks inside. Liquid level tells a story fast. If the level sits above the outlet pipe, wastewater is not leaving the tank, which suggests a drain field or outlet problem. If the level sits below the inlet, the tank may be leaking.
The inspector also measures the sludge layer on the bottom and the scum layer on top. Inside the tank, solids settle out while liquids flow onward to the drain field through perforated pipes, as the US EPA describes it. When sludge and scum take up too much of the tank, solids start escaping into the drain field, and that is the most common path to expensive failure.
This is the point where an inspection often turns into septic tank pumping. Pumping the tank is part of a proper inspection anyway, because the inspector cannot see the tank walls and baffles through three feet of sludge.
Step 4: What Happens to Your Tank Structure During Septic Inspection Steps
Once the tank is empty, the inspector checks the parts that keep the whole system working. This is what happens during the septic system inspection that a quick look from the surface can never cover. A thorough check includes:
- Looking for cracks in the tank walls and floor
- Verifying the inlet and outlet baffles are intact and doing their job
- Checking that the lids and risers seal properly
- Taking photos of the tank interior as a record of structural condition
Baffles matter more than most owners realize. The outlet baffle stops floating grease and solids from washing into the drain field. When it rots away, the drain field starts eating solids it was never designed to handle. Catching a failed baffle during a routine pump-out is a cheap fix; missing it for five years is how a leach field dies.
For rental properties, ask for those interior photos. They give you a dated record of tank condition, which helps with capital planning and with any code enforcement questions.
Step 5: Walk and Test the Drain Field
The drain field, also called the leach field, is where most of the money lives, so the inspector walks it carefully. After the tank does its work, liquid flows out through perforated pipes into the absorption field and filters through gravel, sand, and soil, according to the U.S. Environmental Protection Agency.
The inspector looks for warning signs on the surface:
- Standing water or mushy ground over the field lines
- Grass that grows greener and faster in stripes over the field
- Sewage odor near the field, especially after laundry day
- Wastewater surfacing at the edge of the field
Then the crew confirms drainage is flowing as it should, often by watching how the field accepts water during the flow test from Step 2. A field that ponds water during a ten-minute test is telling you it is saturated or biologically clogged.
Here is where honesty matters. An inspection can tell you a drain field is struggling, but confirming why sometimes requires more, such as digging test holes or a soil evaluation. If replacement is on the table, a percolation test is required to measure how well the soil drains before a new system goes in, according to University of Nebraska-Lincoln Extension. That work belongs to a licensed professional, not a weekend project.
Step 6: Get the Findings and Set a Maintenance Schedule
Finally, a good inspector explains what they found in plain terms: what is fine, what needs watching, and what needs repair now. You should leave the visit knowing three things. Is the tank sound? Is the drain field accepting water? When is the next pump-out due?
That last one is where ongoing septic system maintenance starts. For an active family of four, Penn State Extension advises pumping every two to three years because of higher solids and water use. A rental duplex with four adults per side fills a shared tank faster than the previous owner's schedule assumed, so adjust the interval to actual occupancy, not habit.
Between visits, the routine is simple. Keep grease, wipes, and harsh chemicals out of the drains. Fix running toilets fast. Skip the additive products; a septic system is a biological ecosystem, and regular pumping protects it better than anything poured down a drain. As of 2026, no additive replaces a pump-out.
Can a septic tank go 20 years without being pumped?
A septic tank should not go 20 years without being pumped, and most tanks that do have already pushed solids into the drain field. A lightly used tank might survive longer between pump-outs than a busy one, but 20 years exceeds any recommended interval. By the time symptoms show, the damage is usually in the field, not the tank.
Septic problems build slowly and quietly. That is why what happens during a septic system checkup matters more than what happens during a crisis; the inspection catches the failed baffle or the saturated field while the fix is still small.
A Realistic Example of How This Plays Out
Suppose a homeowner in Fontana notices toilets gurgling on a Saturday and a wet patch near the back fence. In that scenario, an inspection with a pump-out might reveal a tank that has not been serviced in eight years, with a corroded outlet baffle. The pump-out and baffle repair cost a few hundred dollars as an illustrative range. Had it gone another two years, escaped solids could have clogged the leach field, turning a service call into a five-figure replacement.
That is the whole case for understanding what an inspection covers. When you know what happens during a septic system service visit, you can ask better questions, spot a thin inspection from a thorough one, and schedule the work before your yard makes the decision for you.
If you need septic tank pumping, Fontana Septic can help.
Prefer to talk it through? Call (909) 316-2368 — a quick call is usually the fastest way to get a straight answer for your situation.